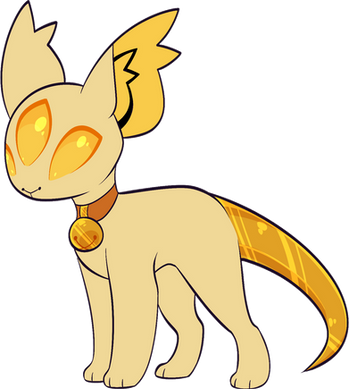

Art by SKEPTiiCAT (dA/TH) / SKEPTiiCAT#0005

Art by SKEPTiiCAT (dA/TH) / SKEPTiiCAT#0005

Art by SKEPTiiCAT (dA/TH) / SKEPTiiCAT#0005
Auri Anatomy
+ MYO guide
Aurii obtaining methods
There are many different ways to get an auri!
The easiest way is through MYO (Make your own) slots. Additional slots and special auri can be gained through prizes, donated designs, and breeding.
Everyone starts out with 4 MYO slots when they join the group!
-
MYO slots (Make your own)
Everyone starts off with 4 free MYO slots when they join the group. Extra MYOs can be purchased from the store for 3 Jades or won from events. Aurii made via MYO slots do not start with any upgrades unless any of the starting upgrades are used or an upgrade item such as an Upgrade Ring or Upgrade Voucher is used. -
Prize Aurii
These are special aurii received as a prize via group events (ex. raffle, DTA, Sweet Tooth Celebration). These aurii come pre-made with upgrades! -
Purchased/Donated designs
Adopts are aurii purchased with real money either through flat sales or auctions. Donated designs are also purchasable, with the occasional freebie in the form of a WTA, DTA, WTE, or raffle. -
Breeding
Bred aurii are received through breeding 2 adult auri! They start off with randomly rolled upgrades and the parents' colors.
Everyone starts off with 1 free breeding slot!
See the Aurillion Breeding Guide for more info.

Standard Aurii Anatomy Breakdown
Here's a general overview of the anatomy of a standard auri!
The rest of this guide will break the anatomy down into its parts: ears, eyes/accent color, bell & collar, gold, colors, and more.

All aurii* can start with any/all of the following upgrades for free:
Baby Teefs - Fur - Peets - Baby Brows - Ferble Whiskers
These are the only upgrades that babies can start with on their application (without the use of upgrade items) and can be removed/changed normally like with any other upgrade!
As they are still upgrades please list them when submitting your auri!
*Also note this applies to all subspecies too, as well as standards!
Ears
Eyes & Accent Color


There are 2 types of ears your MYO can start off with, Retro Ears or Spiked Ears!
Retro Ears are very versatile in shape, consisting of 4 "spikes". If they're gold, you can get a little more creative with them as shown above.
The Spiked Ears are less versatile but may be easier to draw. The insides of the ears start out accent color and have a pure black mark inside as shown above. The pure black cannot be color shifted onto the body.
Don't like your initial choice?
Don't worry, you can change it later with an upgrade!
Aurii start out with 3 eyes!
All eyes start as one solid color, with no sclera or pupils.
This color is also the accent color, is the starting color of a variety of upgrades, and is the color of the auri's blood/flesh, tears, inside ear (if using Spiked Ears), mouth/tongue, etc.
Legal colors are explained in the "colors" section of this guide.
If you find yourself unsatisfied with your choice don't fret! You can change this later on with an upgrade!
Tail Length & Limits
Your auri's tail should be around the length pictured below! It may NOT be any shorter than the example, and should not be overly long (there's an upgrade for that!).
The tail may also NOT be too thick (there's an upgrade for that too!) OR whip-thin (that's a subspecies thing!)!

Bell & Collar

The bell & collar are a simple yet essential part of the aurillion as it is the manifestation of their soul.
Regardless of its material, it is extremely sturdy, hard to break off, and cannot normally be removed from the body. It can sustain quite a bit of damage, and while the auri won't feel great with a damaged collar it's usually livable.
However, if the bell is damaged, it is sure to cause permanent health issues to the auri. Please do not depict a damaged bell or collar unless you get the proper injury upgrade(s) for it!
Colorwise the collar starts off as one solid color. This can be changed later on, so don't worry! The material starts off as a leather-like material that is completely smooth. It is simple & wide in shape and size. The collar can stretch a bit, but not a lot.
The bell starts off as a decently sized sphere with either one or two throats at the bottom!
The bell's overall size should be just a bit bigger than the width/height of the collar.
The minimum size of the bell should be about the same width/height as the collar, make sure not to make your collar too thin as this will throw off your bell size!
The maximum size of the bell shouldn't be any larger than about a little under twice the width/height of the collar.
The buckle should start out as shown, a rectangular buckle that connects the bell to the collar. It may also be depicted as more triangular (ex. see the fused gold placement example auri). The buckle is gold like the bell!
Gold
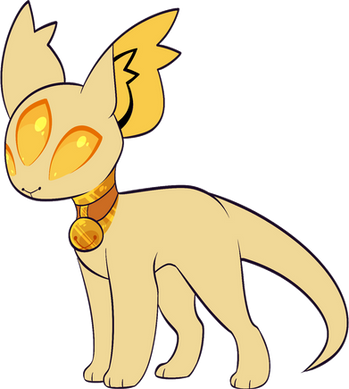
The signature part of an aurillion is its gold placements!
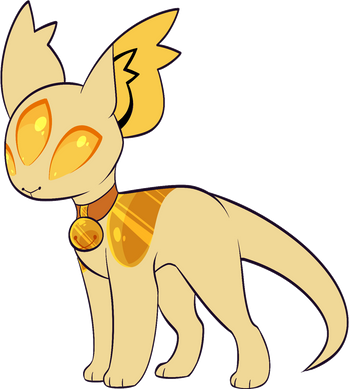
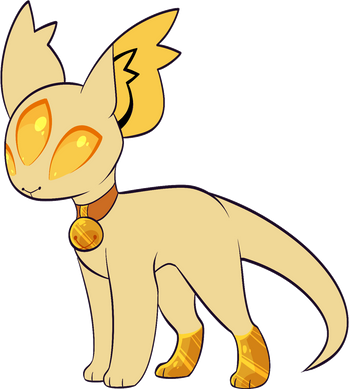
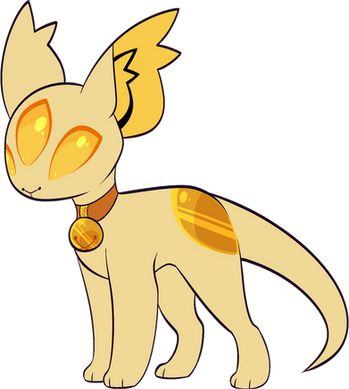
There are many different starter placements to choose from and you may select up to FOUR (4) gold placements! An auri must have a minimum of ONE (1) gold placement. If the placements overlap, they can be fused together, though this would not count as 1 placement.
For example, fusing the back placement and the tail placement will count for 2 placements, not 1.
Use the arrows to view all the placements!
Here are a couple of fused placement examples shown to the left!
You are not limited to only the ones shown in the example, however, the placements have to overlap or be extremely close to each other to be able to be fused together.
Below is the range of legal gold colors:
You do not have to use these exact colors, however, your choice should be relatively close to this example swatch.
The main points are: gold should not be dark/dull, it should be saturated & bright, it should be yellow/gold-orange.
If you are dissatisfied with your initial gold color don't worry! You can change it later, and there are a variety of different gold type upgrades that your auri can get later on too!


In order to differentiate gold from color placements, gold must always have a shine to it!!
Gold may be drawn in a lineless or lined fashion but there must always be shine to it at least.
Colors


Now onto the colors!
Aurii start with one solid base color that should take up the majority of the body. This base color cannot be neon/fully saturated in color.
Aurii can also have up to 3 secondary colors within the same general hue as the base color. These secondary colors may overlap but not in a way that creates markings. Patches must be very large and 'blobby'.
The base color and secondary colors may not be pure black or any color close to black for upgrade/lore reasons. If your auri has a grey/white base, the secondaries do not have to be grey! They can be another color but these colors must all be in the same hue.
For example a white base with 3 shades of pink as secondaries.
The collar color follows the same general rules, nothing too close to black and one solid color.
The accent color has additional limitations. It must be one solid color that goes on all three eyes (& inner ears on Spiked Ears). This color cannot be black/very dark or white/too pale, also for lore/upgrade reasons.
Dark-colored eyes are a Melanistic trait while white eyes are a Blindness trait.
When drawing art for applications please do not include any shading or lighting EXCEPT in the eyes (optional) or on the gold (mandatory). Please make sure if adding shine/shadows to the eyes that it stays simple and doesn't mimic Multi-colored Eyes or pupils, etc.
Below are some examples for markings dos and don'ts:

Let's take a look at an example. Here's Zeke, a freshly made MYO, however, there's a lot of things to fix here:

-
His base color is far too bright and is considered "neon"!
-
He has too many secondary colors, MYOs are only allowed up to 3, Zeke has 4!
-
None of his secondary colors are within his base color's hue!
-
All of the markings must be removed as they are not allowed on MYO aurii!
-
His gold is too dull/dark! It should be bright and saturated!
-
His bell is looking a little too big there!
-
Pure black is not allowed as well!
Even if there's a lot to fix, Zeke's anatomy is good overall!
Below are some more examples of illegal auri along with 'fixed' versions.


Reason for illegality:
Nearly all of the colors are too dark! Everything needs to be lightened up. Make sure that black lineart is clearly distinguishable from the colors.
Reason for illegality:
The secondary colors do not match up with the base color's hue! The eyes are also far too light in color. The auri's proportions are a bit off and the tail is too short.
Reason for illegality:
The color placements take up too much of the base color! Some of them also look too much like markings such as the bands and the small spots.
Here are the expected fixes for the examples above!


Corrections made:
All the colors have been lightened up so that you can see it clearly against the black lineart.
Corrections made:
The secondary colors have been adjusted and now better match with the base color hue. The eyes were darkened/saturated more too. Lastly, the proportions were adjusted and the tail was lengthened.
Corrections made:
The secondary color placement coverage was reduced and the markings have been made blobbier and more spaced out to prevent marking imitation.
That's about it for standard auri anatomy! All that's left is submission & approval!
If you've got a subspecies needing approval, check out the Subspecies Anatomy section in the guides menu!
For transfers check out the Transfering an OC guide!
Approval & Submission
All done drawing? Great! Here's what to do to get your auri approved!
Firstly, draw your auri on the application template!
PLEASE do NOT right-click and download the image on the website.
Instead, click one of the buttons underneath it to download the template!
Then, fill out all the blank spaces for the colors and name!
Here's a key to what the letters stand for:
B = Base color
S = Secondary color(s)
A = Accent color
C = Collar color
G = Gold color
Remember that the eye color = accent color
When drawing make sure that your auri is in a normal standing pose. You will be asked to change or add a fullbody standing pose to your application if that's not included.
If your auri is not a MYO (Prize/adopt/bred/etc.) a staff member should have DMed you a special application!
If you have not received one, please alert us in #general-help!


Now that that's done, time for the description! Please include this form in the description of your auri's application.
Do not include what's in the red!
The red simply explains what to fill out for each field.
Username: [What's your DA/Group Username?]
Name: [What's your auri's name?]
Creation: [How did you go about creating your auri? Ex. MYO, bred, purchased, prize, etc.]
Species: [Standard, Naganid or Munchkin?]
Upgrades: [If using any freebie upgrades (fur, whiskers, etc.) and/or upgrade items!]
Blank description for convenience:
Username:
Name:
Creation:
Species:
Upgrades:
Don't forget to count your bells! Even if it's not in a gallery channel, you still earn bells for application art. Bell count should be included just underneath the form! Information about counting bells is linked at the bottom of the page!
You should be all set to submit your application to the #baby-approvals channel now, just remember to include your bell count at the end of the description!
Counting Bells & Upgrading
Counting bells & upgrading are 2 core mechanics of the group! You'll need to count bells in order to upgrade your auri and have access to some of the other mechanics such as earning Jades (our premium currency)!
To get started with bells & upgrading, click the 2 buttons found below!


